Triplit Cloud is no longer accepting new users, and we recommend that you self-host your Triplit database instead. Please see our self-hosting guide for more information on how to set up your own Triplit server.
Self-hosted deployments
Triplit Cloud is fully compatible with self-hosted Triplit servers. This means you can deploy your own Triplit server and connect it to the Triplit Cloud dashboard, and reap the benefits of easier server management and use of the Triplit Console.
Create a project
-
Sign-in or sign-up for a Triplit account (opens in a new tab)
-
Click the Create Project button
-
Provide a name for your project. This will act as a friendly alias for your project throughout the dashboard.

Deploy your project
After creating your project, you'll be shown some information about your project, and instructions for deploying a self-hosted machine.
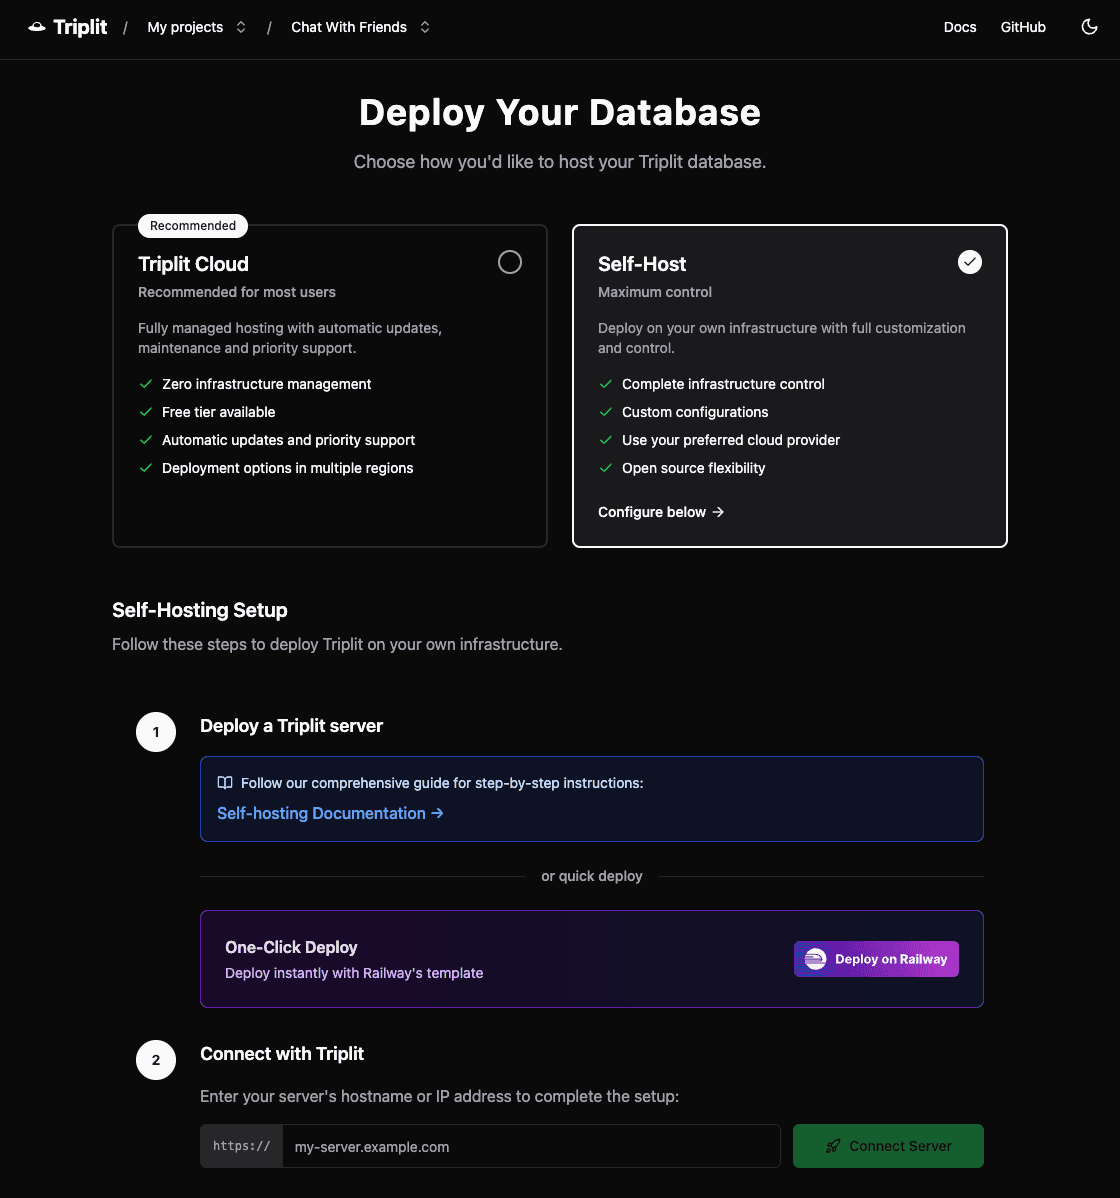
You have two options for deploying a self-hosted machine:
- Railway: One-click-deploy a Triplit server using Railway. This is the easiest way to get started with a self-hosted machine, and won't require any configuration.
- Docker: Deploy a Triplit server using Docker on a platform of your choice. This will require you to configure your server with the necessary environment variables.
We plan on adding many more one-click-deploy options in the future, so stay tuned!
Configure your server (Docker only)
If you're not using one of the one-click deploy options, you'll need to configure your server to accept requests from the Triplit Dashboard.
If you plan to connect your self-hosted Triplit server to the Triplit Dashboard and use JWTs for authentication and permission within Triplit, EXTERNAL_JWT_SECRET should only be set on your Triplit Dashboard. Ensure the env var is NOT included wherever you deployed your Docker image. Otherwise, you may encounter errors related to invalid JWTs and JWT signatures.
JWT_SECRET
The secret used to sign and verify JWT tokens. To use the Triplit Dashboard, set this to the official Triplit public key, provided below.
-----BEGIN PUBLIC KEY-----MIICIjANBgkqhkiG9w0BAQEFAAOCAg8AMIICCgKCAgEA3/h/YykqVaiyqxDpKqyafdsIiGOi/xZ5CXkwzlG8EHfs9L6eB+/zYQ3Aiqvb2ysTCqS53aD2Ktiv44s9Xs1yHNpZkAIQugKdeERhZAQm20DA3DHj1ONZ9jCduUV5C99y5uM06+6FdfwYjrVWpPjuKwdzU+/f5Q4rsG3K2vSRFQX7UYJhnqSfeqXZZ0n5WGqDzRVsSLDgpBtIba7cGQ8v6NJgdRk95SksOXJ/srnSeogWZ2+V6X6J/fxcYwRQYa+YFBcY8ReOWr79pdAScGF0fA89GctCwdxcpVlGHP9zbQe6wY5/LHm84iQ4WP8w8azpNcm33DX3QbBbY8c3YPzEyt3qcOTrDqwNPEwsARmf3p2SmkVntB7T89Ca33ppRTPKA6BknbESgE6ShKOoaHC15ZexJP7AYNJ5ap8eXFhlKEM9VfytfkshNgmq7SC0M9WKcrtQFAvpoh0ggzIC0yh/A8ndUCo3DA58p5aRjYOgliuzeQCkI6kRK8fnJKX38q91mhma7lf4nYkYxbhorSTRqS3VLyHSTx9AbiWLYl8zdqAWGYVuysXdKKY1kpQzzwqcY5RT/CEDsVIkO2GB4iNzMqkA3hI3673oBEE+/PhkeIqE2WmL15SCR65OIj7L0XBZgVhqpPdICctD5Xktc684kpdqT2jKW0h2O53iZXFiWhMCAwEAAQ==-----END PUBLIC KEY-----LOCAL_DATABASE_URL (required for durable storage)
An absolute path on the server's file system to a directory where the server will store any database files. This is required for durable storage options: lmdb, and sqlite.
CLAIMS_PATH (optional)
If you are using custom JWTs with nested Triplit-related claims, you can set the CLAIMS_PATH environment variable. The server will read the claims at the path specified by CLAIMS_PATH. Read the authentication guide for more information.
SENTRY_DSN (optional)
If you want to log errors to Sentry, you can set the SENTRY_DSN environment variable. The server will automatically log errors to Sentry.
VERBOSE_LOGS (optional)
If you want to log all incoming and outgoing messages and requests, you can set the VERBOSE_LOGS environment variable. This can be useful for debugging.
MAX_BODY_SIZE (optional)
If you want to increase the maximum body size for incoming requests, you can set the MAX_BODY_SIZE environment variable. This is useful if you want to send large payloads to your server. The default value is 100, corresponding to 100MB.
Add your server's hostname to your project
Once you have a Triplit server running and properly configured, enter its hostname into the form and click Connect.
Use the dashboard
You can use the Triplit dashboard to:
- Mint API keys and rotate them as needed
- Allow your server to accept external tokens signed with different secrets without modifying your server's code
- Manage your data and schema with the Triplit Console
To enable these benefits, your app will connect to a https://<project-id>.triplit.io URL. This will route your requests to your self-hosted server.
Copy the secrets from the Overview tab (pictured below) into your app's .env file.
